RECENT POSTS
Back to College Essentials: Repair Tutorials with Tear Mender
Friday, August 27, 2021

Leaving home for college is exciting, but packing can be daunting. Every dorm-bound college student needs sheets, toiletries, towels, etc., but often sewing kits do not make it on the packing list. Many teenagers head off to college without basic sewing skills, forcing them to get a little creative when faced with tears, rips, or holes in their clothing and accessories. Rather than throwing away damaged items (and money), add a bottle of Tear Mender to your child's campus essentials. It not only repairs clothing but can also repair shoes, backpacks, decor, and more. Share this blog with your college Freshmen for tips and tricks on how to use Tear Mender to save time, money and freshen up a bland dorm room.
Expert tip: Use your finger to apply Tear Mender. It’s non-toxic and will easily rub off skin and hard, non-porous surfaces.
Repairs Every College Student Needs to Know
video tutorial below:
Suppose you need a quick solution and don’t mind your pants permanently cuffed. In that case, measure out equal lengths on both pant legs (crucial for making sure the cuffs are even), roll or cuff your pants two or three times depending on the desired length, then use a thin layer of Tear Mender to secure the folds by applying towards the top of the cuff.
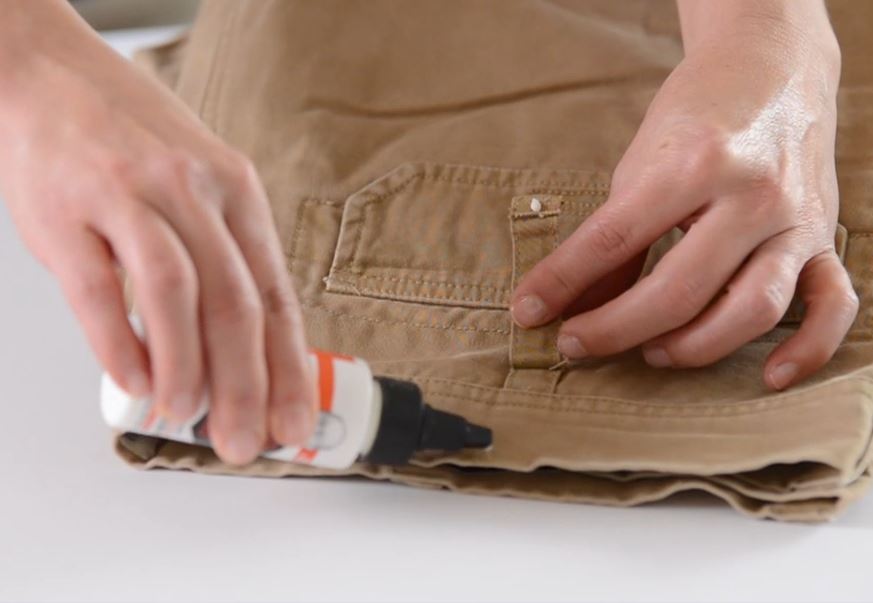
To reattach one or both ends of the belt loop, apply a small amount of Tear Mender to the end(s) of the loop and the area on the pants where you will be reattaching the belt loop. Then press and hold where you want it secured. Click below for a quick video tutorial of this repair.

To remedy a frayed shoelace, trim excess thread, then roll the frayed in between your fingers along with a small amount of the Tear Mender. Once the Tear Mender cures (within 3 minutes), the lace will no longer continue to unravel. You can replicate this repair for any shoe with laces.
For a tear or hole on the bottom of the pack or inside liner that requires additional support, utilize the sandwich method - place a patch on both the underside of the repair and the outside. Make sure the patches are slightly larger than the repair, apply Tear Mender to both the underside patch and the outside patch, then press (sandwich) the material together.

Expert tip: Use your finger to apply Tear Mender. It’s non-toxic and will easily rub off skin and hard, non-porous surfaces.
Repairs Every College Student Needs to Know
Rips, holes, and tears in pants:
- Find a piece of fabric, denim, or anything porous to reinforce the tear (Tear Mender kits come with denim patch fabric).
- Cut the fabric to a size slightly larger than the tear.
- Insert the repair patch under the tear, then apply Tear Mender with your finger both to the patch and underside of the rip.
- Press down and wait three minutes.
Holes in Canvas Shoes
Apply Tear Mender to both edges of the tear, then pinch closed. Shoes are wearable within 3 minutes. For larger tears, use the patch repair method outlined above as shown in the video below:Hem Pants
There are a couple of methods you can use to hem pants. If you want to keep the original hem, follow the step-by-stepvideo tutorial below:
Suppose you need a quick solution and don’t mind your pants permanently cuffed. In that case, measure out equal lengths on both pant legs (crucial for making sure the cuffs are even), roll or cuff your pants two or three times depending on the desired length, then use a thin layer of Tear Mender to secure the folds by applying towards the top of the cuff.
Repair Belt Loops
To reattach one or both ends of the belt loop, apply a small amount of Tear Mender to the end(s) of the loop and the area on the pants where you will be reattaching the belt loop. Then press and hold where you want it secured. Click below for a quick video tutorial of this repair.
Stop Buttons from Unraveling
Using the tip of a toothpick, apply a small amount of Tear Mender to the thread that is coming loose on the button. The adhesive will stop the button from unraveling and falling off. Make sure the button is positioned against the shirt at the desired length, as once it dries it will be secured in place.Preserve Distressed Denim
We all have that one pair of perfectly worn-in jeans; however, wear and tear eventually takes a toll on a well-loved classic. Seeing is believing. Check out the easy repair below:Repair Sporting Equipment
Baseball gloves, hockey skate laces, uniforms, knee pads, and baseball hats. Tear Mender works best when both surfaces of a repair are porous. When fixing a torn baseball glove or sport ball, apply the Tear Mender adhesive to the underside of the leather or material. Tear Mender will not adhere to the non-porous top-side of non-porous materials.To remedy a frayed shoelace, trim excess thread, then roll the frayed in between your fingers along with a small amount of the Tear Mender. Once the Tear Mender cures (within 3 minutes), the lace will no longer continue to unravel. You can replicate this repair for any shoe with laces.
Repair Backpacks
For minor tears or holes, utilize the patch method outlined above. Cut a repair patch a 1/2 in. larger in diameter than the tear. Insert the patch under the rip, then apply Tear Mender to both the patch and the underside of the tear. Press, let cure for 3 minutes, then head to class!For a tear or hole on the bottom of the pack or inside liner that requires additional support, utilize the sandwich method - place a patch on both the underside of the repair and the outside. Make sure the patches are slightly larger than the repair, apply Tear Mender to both the underside patch and the outside patch, then press (sandwich) the material together.
Repair Tears in Comforters
For this repair, we recommend using the patch method to repair the tear regardless of size, as it will help reinforce the bond especially with the often loose or bulky fabric of comforters. Pro tip:If you’re able to turn the comforter inside out, repair the tear while it is inside out for a neater-looking repair. Especially if you elect to use a patch, make sure you secure the patch to the inside layer of the comforter.Repair Canvas Bags
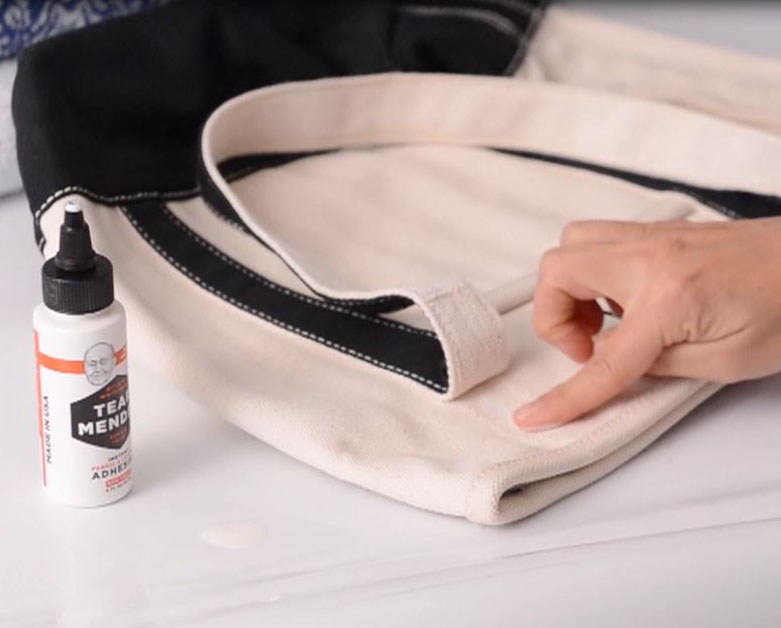
Any of the above-listed repair methods (small, patch, or sandwich method) can be used to repair tears in canvas bags. If you are looking to reattach a strap, follow the method used above to re-attach a belt loop. Line up the strap where you want it then apply a thin layer of Tear Mender to both sides, pressing and holding firmly for a couple of seconds.
